
1940 Ford Coupe
Here's the pics and info for my '40 Ford Coupe.

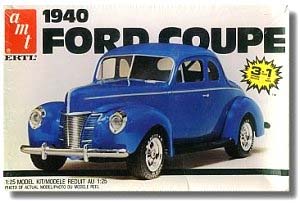
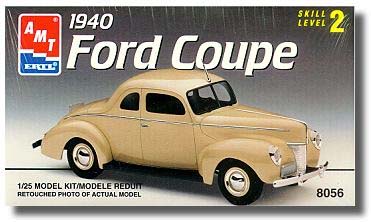
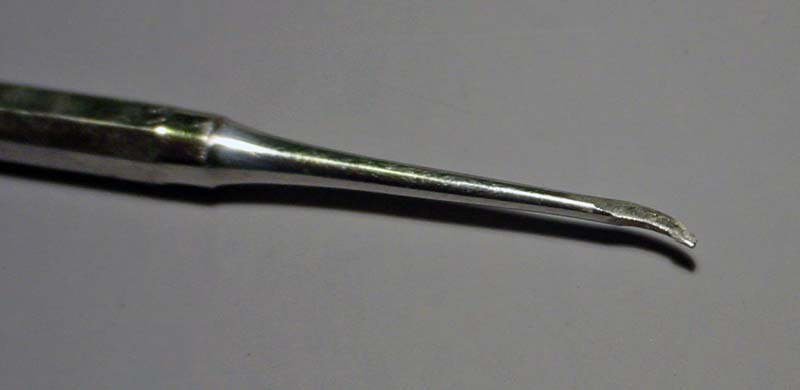
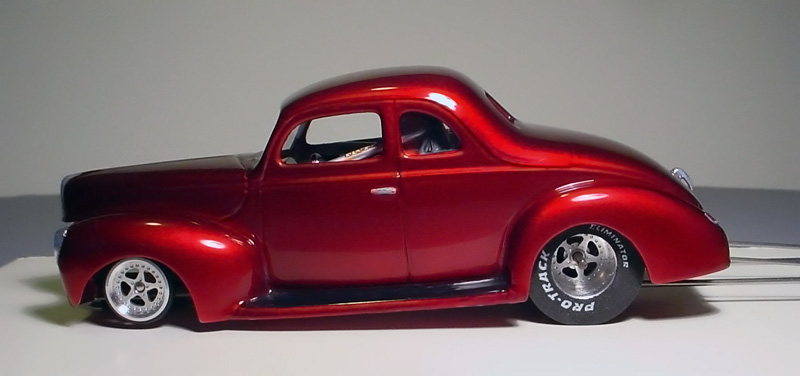
I usually prefer AMT model kits but this one fit together pretty badly. The body comes seperate from the fenders and it doesn't fit well, having large gaps in places which had to be filled. the hood was also a terrible fit and it took me 2 hours just to get it to the point where I was satisfied with it. the raised trim line that runs down the side of the body and hood didn't line up at all and the hood was quite a bit wider than the body. I had to glue it in, sand the sides of the hood smooth and then make my own trim lines on the sides of the hood to match the ones on the body. It was pretty difficult as there is some very tight sanding around the fenders. I actually had to make a tiny sanding block to do it. I also used a scriber made especially for model kits to redraw the hood lines.but all in all, I think that it was worth it-now that it's done.
Here's a closeup pic of the scriber's tip:
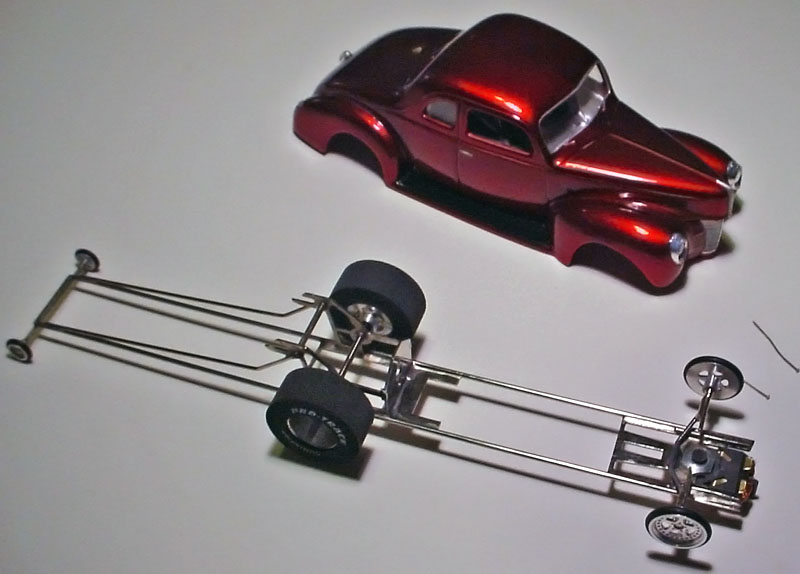
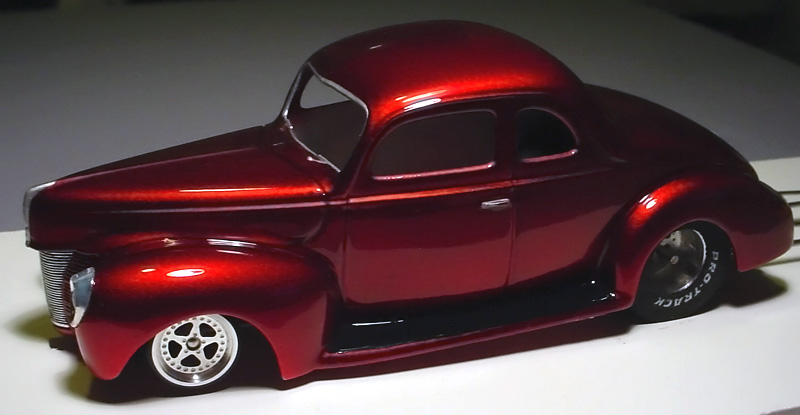
Right now there isn't a current '40 ford coupe kit by Revell or AMT with the front grill like the candy red one in the photo above. Both of Revell's new kits have the "standard" grill, which is actually from a '39.
The one that I used was a vintage AMT kit from 1983. The second one that I built was from a vintage AMT '40 ford kit from 1993. Both of them used the same mold.
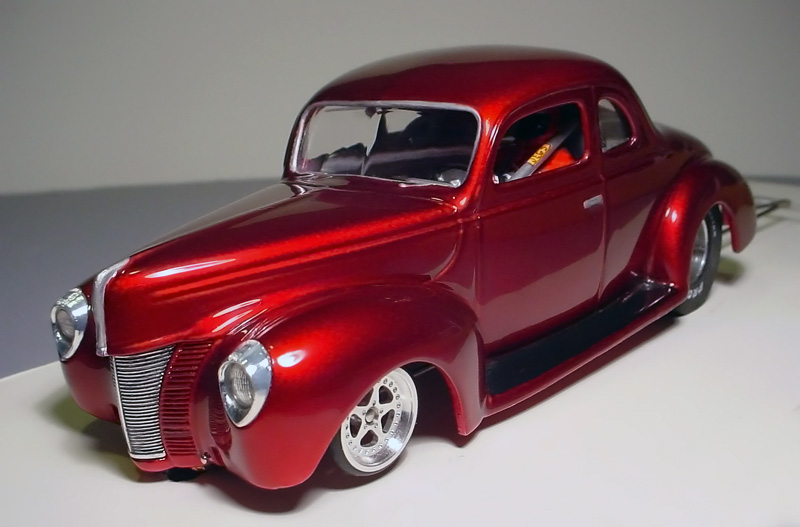
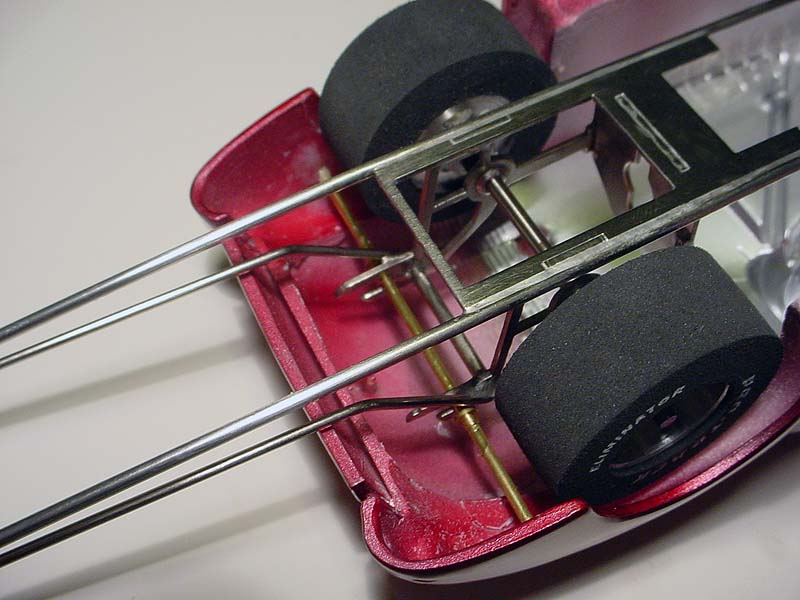
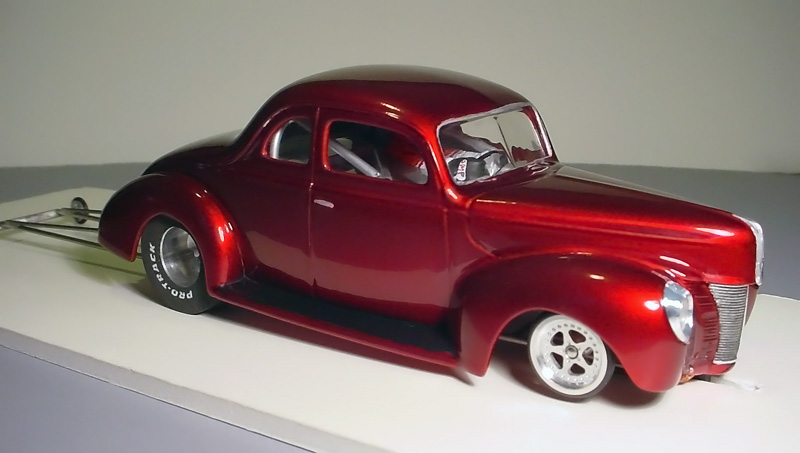
Since I built this car for bracket racing, I used a WRP C-12 Pro Inline chassis so I could easily install a 16D or a super16D motor.The huge rear tires are Pro-Traxk 1 3/16 x.500 Star spoked alloys. After building/soldering it on my Lucky Bob's chassis jig, the chassis was cleaned with a Dremel abrasive wheel and soaked in baking soda. Then I tumbled it in walnut shells. Next, I nickel plated it and finally wiped it down with some Nev'r Dull. It almost looks like it's chrome plated now.
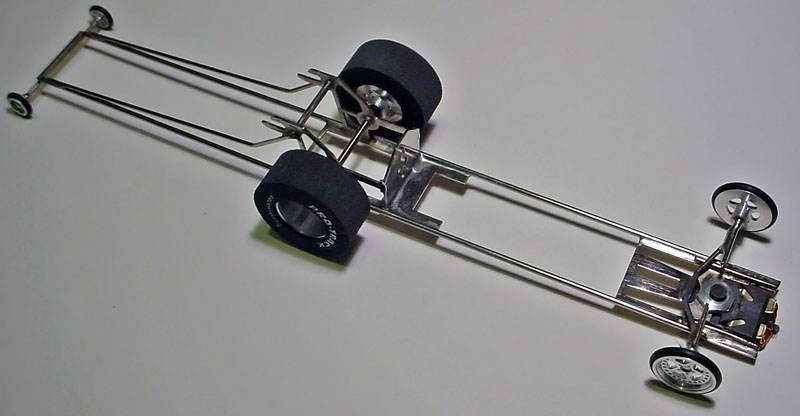
( As always, click on any photo for a larger image)
I mounted the body in the same manner that I mount my Willys bodies. Two pins in the front and a glued-in rod in the rear in which the chassis can hook onto.
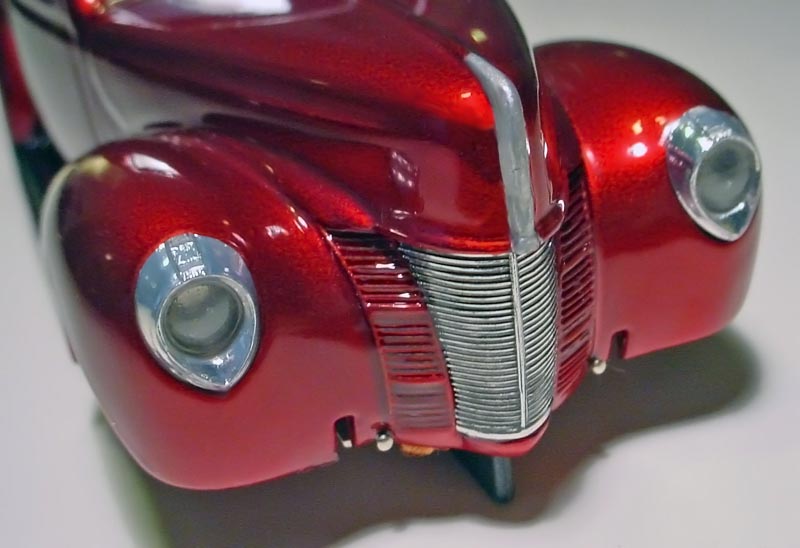
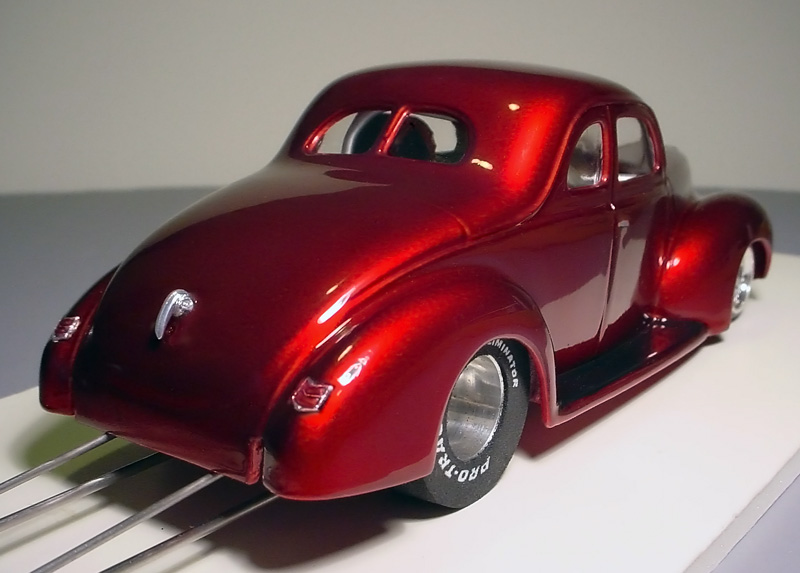
After getting the body into shape, it was primed first with Tamiya surface primer, then Tamiya's FIne surface primer. Next I airbrushed a silver with some pretty large iridecence (flakes) to make the deep red candy color really pop. Then it got one coat of PPG automotive polyurethane. I then hand painted the window trim and hood release with Mirra-chrome. After that, I hand painted the running boards with black lacquer. The headlights, grille, the tailights, and rear trunk latch were epoxied in place and finally 3 coats of PPG poly were used to seal everything up and give it a glass-like finish. Here's three pics of it before I installed the glass and the interior:

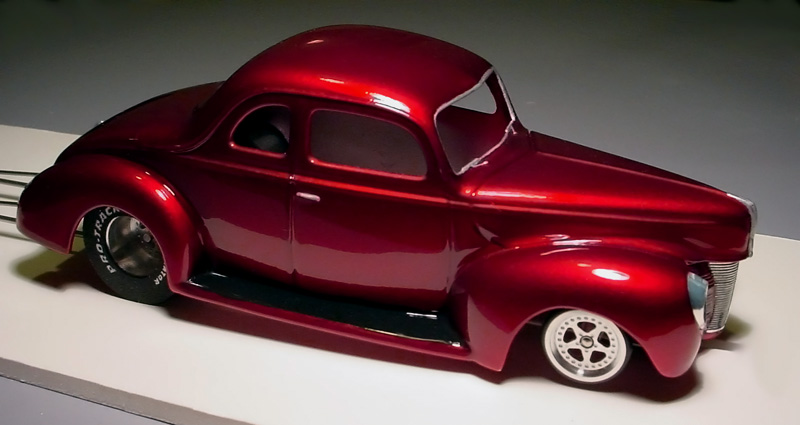
When everything was completely cured, I glued in the glass and installed a detailed inerior, complete with a roll cage. The final result has already turned quite a few heads at the local track. This car has become one of my favorites.
Thanks for taking the time to visit my '40 Ford page!
-johnk