
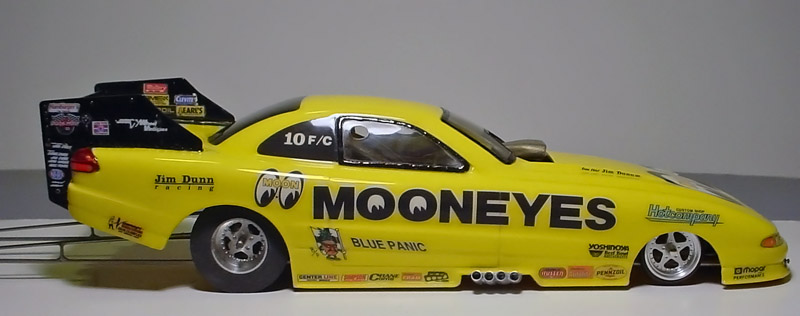
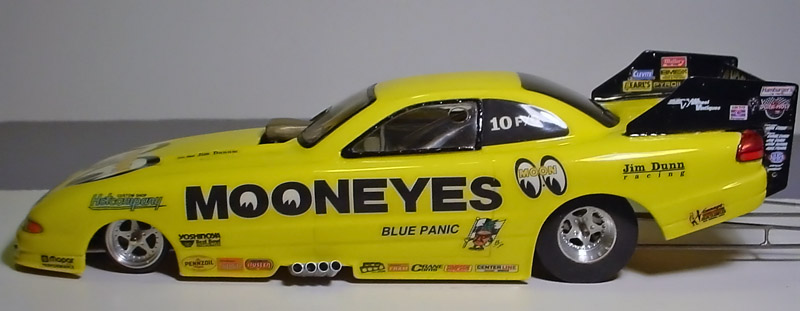
MOONEYES FUNNYCAR
Here's some pics and info on my Mooneyes Funnycar.
(click on any photo for a larger image)
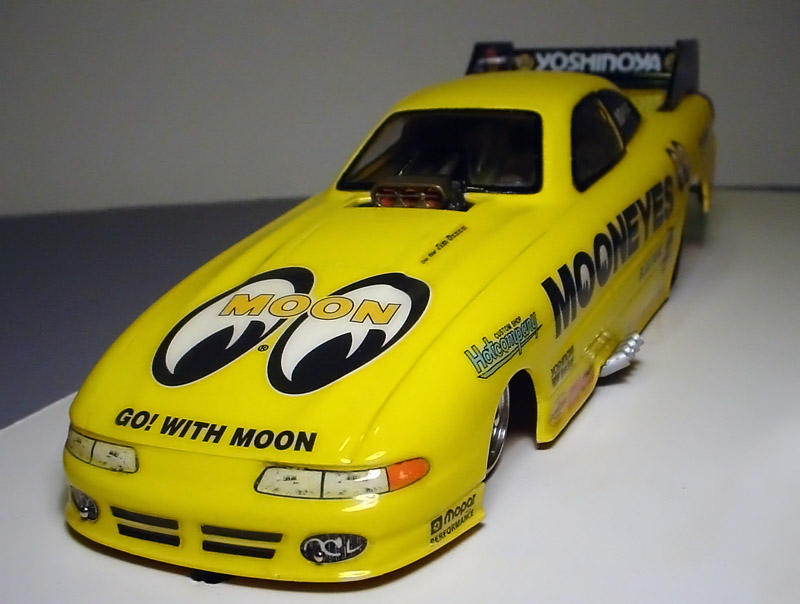
The body and decals came from a Revell model kit. I chose this one because the body is lighter and thinner than most of the other Revell funnycar kits.
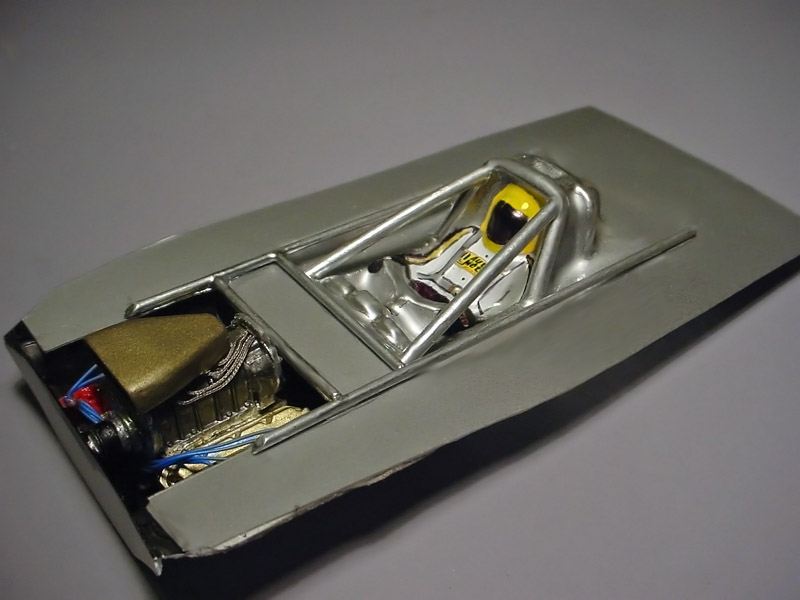
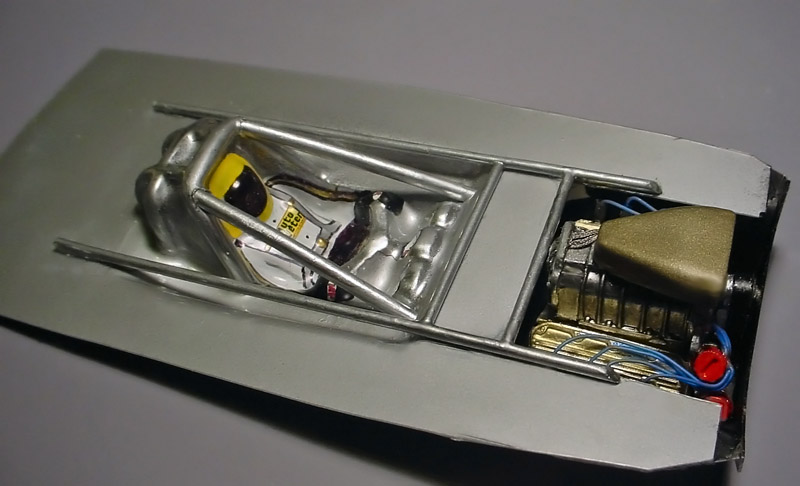
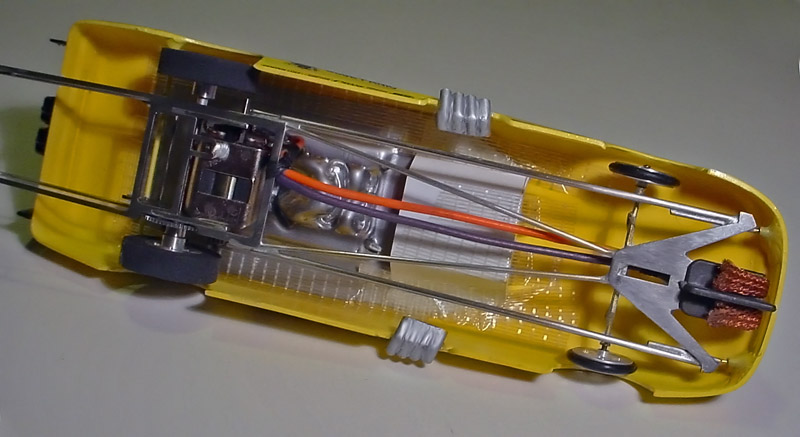
I started by building the chassis on my Lucky Bob's dragster chassis jig. For this car I chose a sidewinder chassis from T/R Racing. I used JDS Stainless tubing and Slick7 "Racing Bronze Bushings" with a Koford 3/32" axle. After I decided on the body mounting method and determined the correct wheelbase, I cleaned up the chassis with a dremel abrasive disc and then soaked it in water with baking soda. After than I nickel plated the entire chassis to keep it from corroding and give it a nice finish.

The rest of the components used are a Slick7 graphite guide with aluminum mounting nut, Parma braids, WRP wheelie wheels, Sonic drilled aluminum spur with a Sonic steel pinion. The motor is a ProSlot Top Gun #PS-733 with Top Qualifier lead wires. The wheels and tires are 5 spoke Speed Secrets.
I wanted to mount the body without it being too obtrusive, so for the front, I drilled two holes in the front of the nose and glued in two small pieces of 1/16 brass tubing to align with the ones on the front of the chassis.
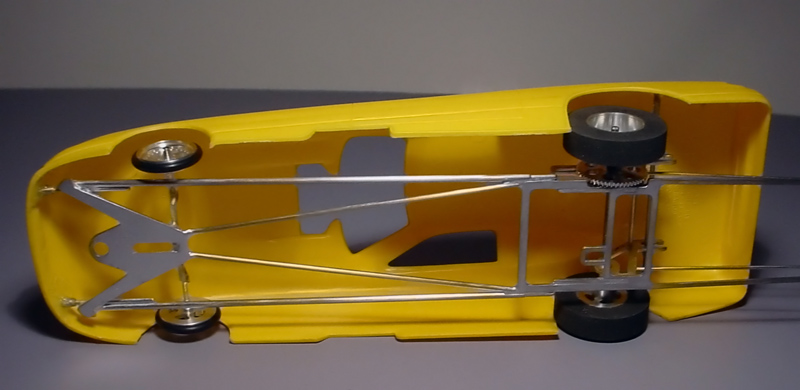
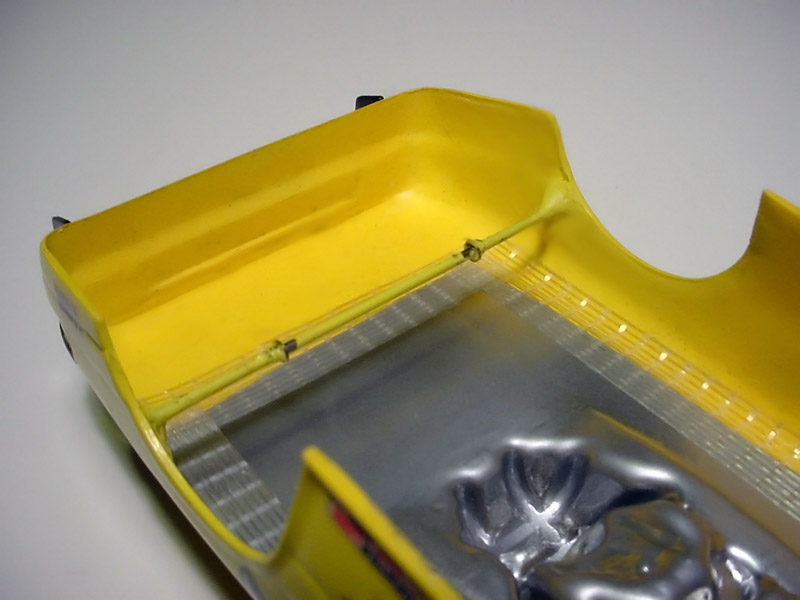
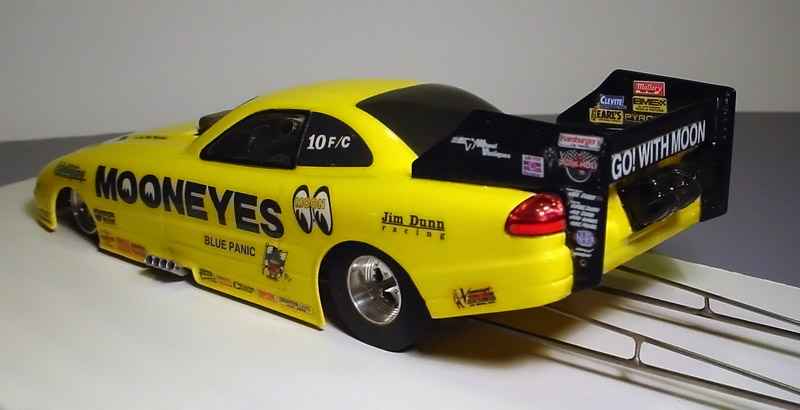
The rear is mounted by gluing a piece of 1/16" tubing into the rear of the body. The chassis' rear mounting holes were opened up to allow the chassis to slide onto the bar. Two 1/16" brass retainers are soldered onto the bar to allow about .060" of lateral play. Then two small straight pins are inserted in the front to complete the system.
(rear body mounting tubing)
I had a detailed funnycar interior made for me by John Donaldson but I also added some framing with styrene rod painted silver to it since so much of it shows thru the windows. I then cut out the front of it to mount the engine (which is actually only the top half of it) onto a "U'shaped "tray". After detailing the engine with paint, I installed some blue ignition wires with sparkplug boots and some stainless braided hose for the fuel lines into the injectors.
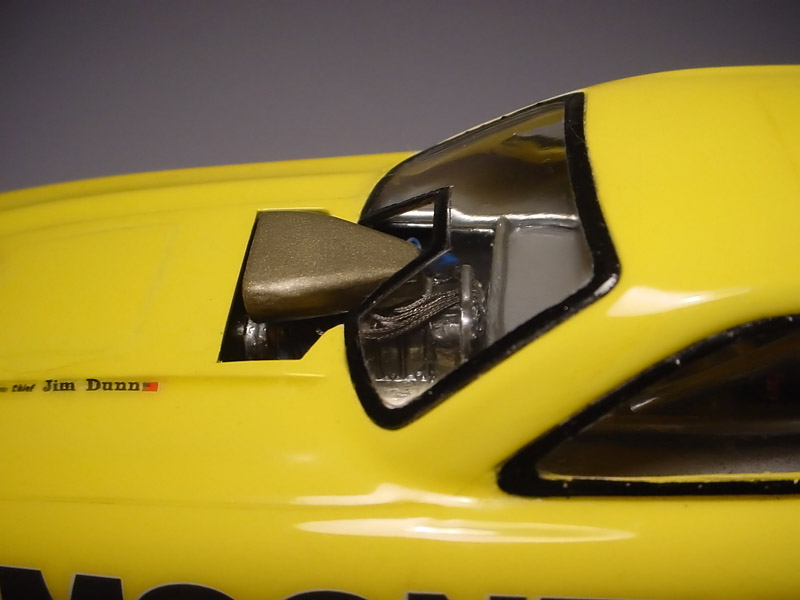
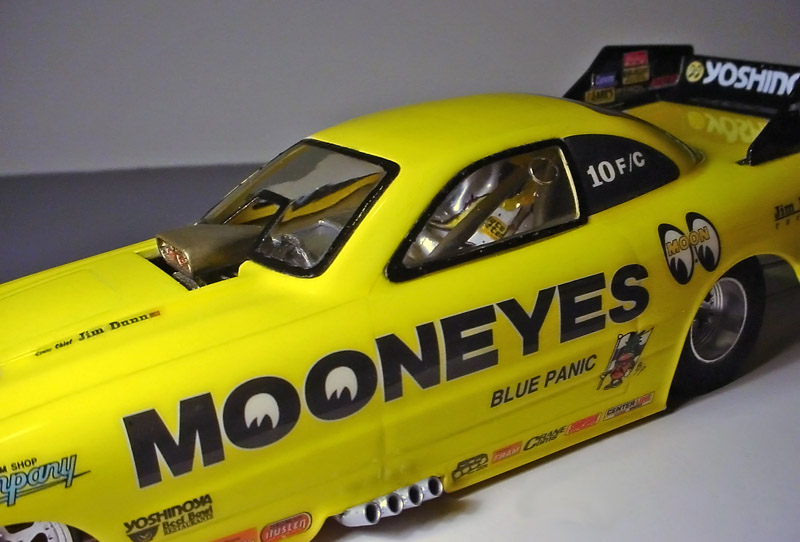
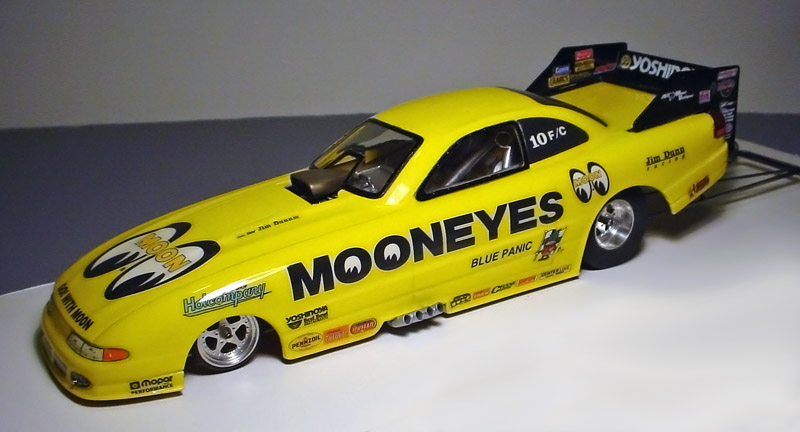
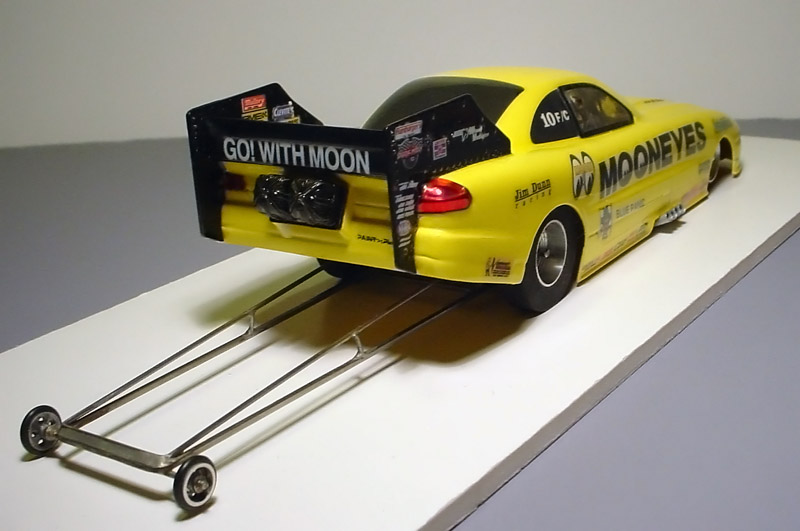
I painted the body with yellow laquer using an airbrush. The taillights were painted on the outside with translucent red laquer and on the inside with Alclad chrome paint. When dry, they were epoxied in place. The rear wings were painted with gloss black laquer before they were epoxied on. When dry I then gave the entire car one thin coat of PPG 4+1 automotive polyurethane. 24 hours later, it was time to apply the decals. The kit states that these particular decals are NOT compatible with decal setting solutions, so I just used water as directed. Once the decals cured (after 24 hours), I gave the car two coats of PPG polyurethane to seal them in and to give the car a really high gloss finish. I painted the black reinforcement trim around the windows by hand with a brush with Testors black laquer. When dry, I went over the black with a brushed on coat of PPG clear. When completely dry, I then epoxied them onto the body.
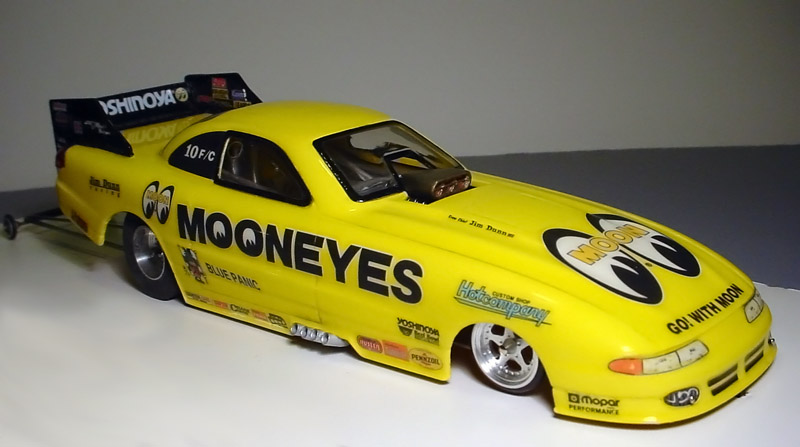
Some of you might have noticed in the pics that I didn't use the model kit's header exhaust. I think the one's from the kit look terrible so I made my own from some aluminum tubing, cut them off short and mounted them onto each side of the body
(the bottom view shows the home-made headers)
To me, this car looks more like a highly detailed model kit rather than a slotcar. And I think that it's even cooler that it's a "model kit" that does the scale 1/4 mile in .812 seconds at 69 mph!
Thanks for looking!
-johnk-
